In summary:
- Progression requires a structured plan, not just random practice. Treat your trip like a focused training camp.
- Sequence sports to build skills: Start with SUP for balance, add kayaking for paddle power, then transition to surfing.
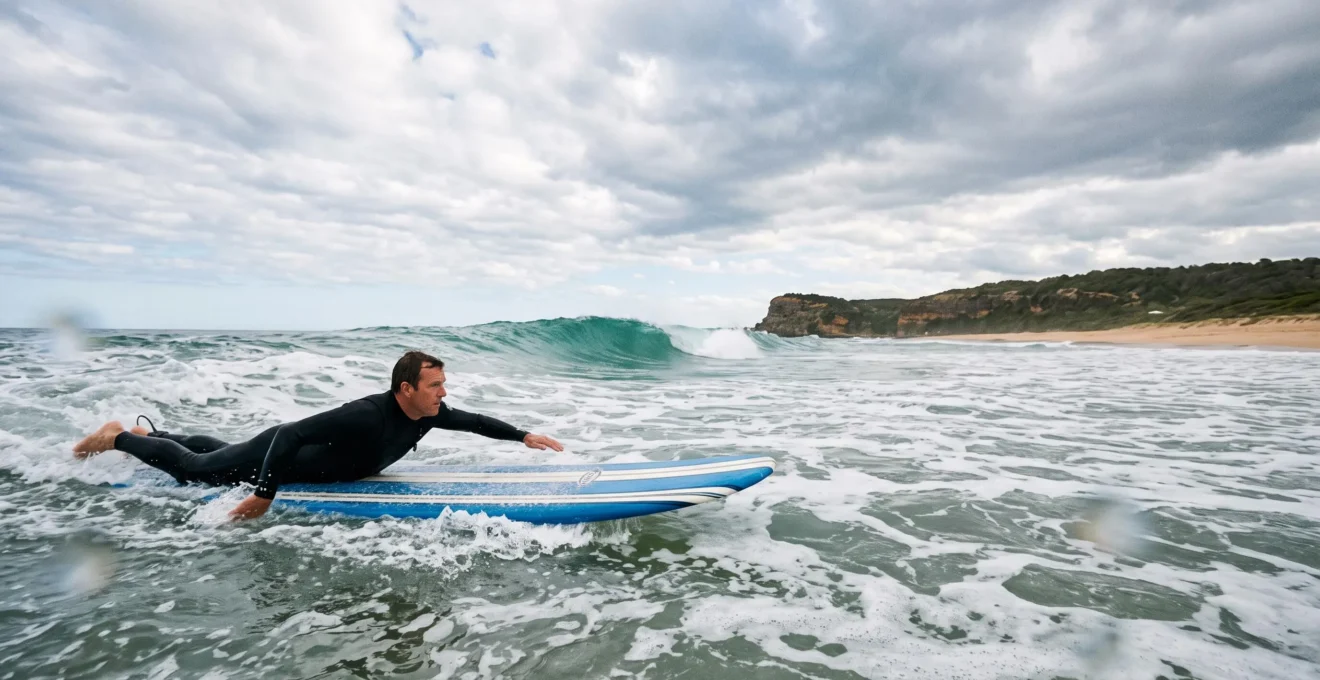
- Choose the right gear. A beginner needs a surfboard with volume equal to 100% of their body weight for stability.
- Plan activities around ocean conditions (tides, wind) and your own physical limits to maximize performance and safety.
- Respect the ocean and local etiquette; climb mountains *before* you scuba dive to prevent decompression sickness.
The dream of an Australian holiday often involves sun-drenched images of gliding across crystal-clear water. Yet for many active enthusiasts, the reality is a frustrating cycle of staying a « perpetual beginner. » You take a single surf lesson, flounder on a rented board for an afternoon, and leave with little more than a sunburn and a sense of missed opportunity. The common advice is to « get a lesson » or « just practice, » but this ignores the fundamental principles of skill acquisition.
What if you could transform that holiday into a focused, highly effective training camp? What if progression wasn’t a matter of luck, but of strategy? The key isn’t just logging more hours on the water; it’s about applying a coach’s mindset to your time. This involves a deliberate sequencing of activities, a technical approach to equipment, and a deep understanding of the environment. It’s about turning Australia’s diverse coastline into your personal, multi-level training ground.
This guide is your playbook. We will move beyond generic tips to provide a structured framework for advancing from beginner to a confident intermediate in sports like surfing, kayaking, and stand-up paddling during a single trip. We’ll deconstruct the process, showing you how to sequence your days, your sports, and even your multi-activity adventures for maximum skill transfer, safety, and enjoyment, without the burnout.
This article provides a structured approach to transform your Australian vacation into an effective water sports skill development camp. Discover the sequence of activities, gear choices, and scheduling secrets to progress from novice to intermediate in one trip.
Summary : A Coach’s Playbook for Water Sports Progression in Australia
- Why Australian Waters Offer Better Learning Conditions Than European or American Coasts
- How to Sequence Water Sports for Skill Transfer and Injury Prevention
- Water Sports Lessons or Equipment Rentals: When Do Beginners Need Instruction?
- The Rental Mistake That Puts Beginners on Intermediate Gear They Cannot Control
- When to Schedule Water Sports During Your Day for Best Conditions and Performance
- How to Take Your First Surf Lesson and Blend In with Locals
- How to Sequence Diving, Hiking, and Climbing to Avoid Injury and Equipment Chaos
- How to Combine Diving, Hiking, and Reef Experiences in One Australian Adventure Without Burnout
Why Australian Waters Offer Better Learning Conditions Than European or American Coasts
Australia’s coastline isn’t just beautiful; it’s a uniquely structured environmental ladder for water sports progression. Unlike the often-monotonous beach breaks of many European or American coasts, Australia offers an incredible diversity of conditions within short distances. You can start on a completely flat, protected bay in Western Australia and, as your skills grow, move to the consistent, rolling point breaks of Queensland. This natural variety allows for a graduated challenge that is difficult to replicate elsewhere.
This vast training ground is supported by a world-class safety infrastructure. While the ocean always commands respect, the sheer scale of professional and volunteer lifeguard services provides a crucial safety net for learners. National safety data shows the coastline accommodates over 16.6 million patrolled visits annually, with thousands of rescues performed, demonstrating a robust system designed to manage the high volume of water users. This allows beginners to push their limits in relatively controlled environments.
This combination of geographical variety and safety makes Australia a premier destination for building water confidence. You can systematically increase the difficulty by choosing your location, moving from one « level » to the next as your competence improves. Here are a few examples of this progression:
- Byron Bay’s Main Beach: Offers gentle, rolling whitewater ideal for absolute beginners learning to stand.
- Noosa Main Beach (Queensland): Features consistent, forgiving point-break waves, perfect for learning to paddle and catch your first « green » waves.
- Torquay’s Fisherman’s Beach: Provides sheltered bay conditions, excellent for first-time stand-up paddleboarders and kayakers.
- Glenelg (Adelaide) and Scarborough Beach (Perth): On smaller days, these protected city beaches offer safe options for practicing in different coastal regions.
This environmental variety, from calm bays to peeling point breaks, acts as a natural curriculum for any aspiring water sports enthusiast.
As the image illustrates, the ability to move from the tranquil turquoise shallows of a protected bay to the organized lines of a point break is the continent’s secret weapon for skill development. You don’t need to book a different holiday to find a different challenge; often, you just need to drive to the next bay.
How to Sequence Water Sports for Skill Transfer and Injury Prevention
True progression isn’t about mastering sports in isolation; it’s about skill stacking. This coaching principle involves using the skills learned in one activity as the foundation for the next, more complex one. Randomly switching between surfing, kayaking, and paddleboarding is inefficient and can lead to frustration and injury. A deliberate sequence, however, accelerates learning and builds a solid, transferable skill base.
For a beginner on a single trip, the optimal sequence is designed to build balance, core strength, and water awareness progressively. Think of it as a three-stage process:
- Start with Stand-Up Paddleboarding (SUP) on Flat Water: This is your foundation. SUP is the ultimate tool for developing your « sea legs. » It forces you to engage your core and make constant micro-adjustments for balance. You also learn basic paddle strokes, how to generate power, and how your body’s movement affects the board. Master this on a calm bay or river before adding waves.
- Move to Sea Kayaking: Kayaking builds on your paddling technique but shifts the focus to endurance and reading the environment. You’ll learn how to handle wind chop, read currents, and develop the upper body and core strength required for sustained paddling—a critical skill for surfing.
- Transition to Surfing: With a strong base of balance from SUP and paddle power from kayaking, you’re now ready for surfing. Start in the whitewater, practicing the « pop-up. » Your body is already familiar with the instability of a board, and you have a better understanding of ocean dynamics. This sequence removes many of the variables that overwhelm pure beginners, allowing you to focus solely on the act of riding a wave.
This structured approach also helps prevent common overuse injuries. By varying the muscle groups you use each day, you avoid overloading your shoulders, back, or knees. It’s a smarter, more sustainable way to spend long days in the water, ensuring you finish your trip stronger, not broken.
Water Sports Lessons or Equipment Rentals: When Do Beginners Need Instruction?
The question isn’t whether lessons are better than rentals, but rather at what stage of your progression each is most valuable. For an absolute beginner, starting with a rental to « give it a go » is a recipe for failure. Without foundational knowledge, you will almost certainly develop bad habits that are difficult to unlearn. A lesson is a non-negotiable investment at the start of your journey.
The primary value of a good instructor isn’t just to show you what to do; it’s to provide a real-time feedback loop. They can diagnose a faulty paddle stroke, a poor stance, or a mistimed pop-up instantly—mistakes you wouldn’t even know you were making. This personalized correction is what separates structured learning from frustrating trial and error. A smaller class size often enhances this benefit, allowing for more individual attention.
Case Study: The Power of Personalized Feedback
In a travel account of multi-day surf lessons in Queensland, a participant noted the difference a small group made. With just three students, the instructor could « watch our every move and gave us detailed instructions when we returned to the water about what we did well, what we needed to do differently and also different things to try such as turning. » This level of observation is impossible in a large, disorganized group and is the key to breaking through learning plateaus.
A single lesson is a great start, but to truly progress to an intermediate level, a multi-lesson package is far more effective. The first lesson is often about basic safety and getting to your feet. Subsequent lessons build on that foundation, introducing concepts like turning, reading waves, and paddling out through the break. This aligns with the experience of many learners who find one session is simply not enough to cement new skills.
Great experience! I went with my 7-year-old daughter and she was asking me to go again! The beach is not crowded and wave was totally safe to handle. I wished I had more time to have a 3-lesson session.
– Beginner Surfer, Get Wet Surf School
Once you have a solid foundation from a few lessons, you can then transition to renting equipment to practice and consolidate what you’ve learned. The rule of thumb is simple: learn with an instructor, practice on a rental. Reversing this order is the most common and costly mistake a beginner can make.
The Rental Mistake That Puts Beginners on Intermediate Gear They Cannot Control
The single biggest equipment mistake is choosing a board based on aesthetics or what « looks cool » rather than on physics. Many beginners, eager to look like a pro, rent a small, thin board and spend their entire session falling off. The secret to stability and rapid progression is volume. A board’s volume, measured in litres, dictates its buoyancy and stability. More volume means a more stable platform, which is exactly what a beginner needs.
As a coach, the guiding principle is the volume-to-weight ratio. This technical measure is the most reliable way to choose the right board. For a beginner learning to stand, the goal is maximum stability. A simple but effective rule, as surf coaches explain, is that a beginner should ride a board with a volume in litres roughly equal to 100% of their body weight in kilograms. An 80kg beginner needs an 80-litre board. In contrast, an advanced surfer on a high-performance shortboard might only use a board with 30-40% of their body weight in volume.
This is why beginner boards are thick, wide, and often made of foam—they are designed for maximum buoyancy. Don’t be shy about asking for the « biggest, fattest board » in the shop. Resisting the temptation to rent a sleeker, low-volume board is the first test of a smart beginner. Your goal is to catch waves and have fun, not to look cool while sinking.
Your Pre-Rental Equipment Audit
- Confirm Your Volume Target: Calculate your target volume before you enter the shop (Your weight in kg ≈ Board volume in litres). State this number to the rental staff.
- Inspect the Board’s Dimensions: Look for the numbers written on the bottom of the board. They will list length, width, and thickness. A beginner board should be wide (21-23 inches) and thick (2.5-3 inches or more).
- Do the « Hug Test »: A high-volume board will feel buoyant and substantial, not light and wafer-thin. It should be relatively difficult to tuck under one arm. If it feels sleek, it’s likely too advanced.
- Check the Material: For your first few sessions, a soft-top (foam) board is ideal. It’s more stable, less intimidating, and safer for you and others in the water.
- Ask for the Leash and Fins: Ensure the rental includes a leash in good condition (no cracks or rust) and that the fins are securely attached.
Getting the right equipment is not a minor detail; it is the most critical factor determining your success and enjoyment in the water. Ignoring volume is the most common rental mistake, and it is entirely avoidable.
When to Schedule Water Sports During Your Day for Best Conditions and Performance
The best water sports session is not just about your skill, but about timing. The ocean is a dynamic environment, and scheduling your activity to align with the best conditions can be the difference between a joyful experience and a frustrating battle against nature. A smart athlete doesn’t fight the conditions; they work with them. Four key factors should dictate your daily schedule: tides, wind, crowds, and your own physical energy.
First, understand the tides. Tides have a profound effect on waves and currents. For surfing, an incoming (pushing) tide is often preferable, as it can create cleaner, more powerful waves. A low or outgoing tide can make waves weak or create strong currents (rips) that pull you out to sea. For flat-water SUP or kayaking, tidal currents are the main concern; paddling against a strong tide is an exhausting workout you want to avoid. Always check the local tide chart before you go.
Second, watch the wind. Wind is the enemy of smooth water. For surfing, a light offshore wind (blowing from the land to the sea) is ideal, as it holds the waves up and keeps them from breaking prematurely. An onshore wind (from sea to land) creates messy, choppy conditions that are difficult to ride. For SUP and kayaking, the less wind, the better. An early morning session, before the daily sea breeze kicks in, is often the calmest and most enjoyable time for paddling.
Third, beat the crowds. Popular surf breaks and beaches can get incredibly crowded, especially mid-day. This is not only less enjoyable but also more dangerous for a beginner. An early morning « dawn patrol » session is often the best way to secure a less crowded space, cleaner conditions, and a more relaxed atmosphere. Finally, listen to your body. Don’t schedule a demanding surf session right after a long-haul flight or a heavy meal. Proper hydration, nutrition, and rest are key components of performance. Plan your most strenuous activities for times when you feel fresh and energized.
How to Take Your First Surf Lesson and Blend In with Locals
Your first surf lesson is as much about learning culture as it is about learning technique. Walking into a local surf spot as a tourist can be intimidating, but the key to blending in is simple: show respect. This respect has two dimensions: respect for the power of the ocean and respect for the unwritten rules of the lineup.
Before you even touch the water, you must respect the ocean. Australian waters can be dangerous. Your instructor will teach you about rips, currents, and how to read the water, but this knowledge is your responsibility to retain. Never surf at an unpatrolled beach, and always take a moment to observe the conditions before entering. Asking a lifeguard or an experienced local for advice on the day’s conditions is a sign of intelligence, not weakness.
Once you are in the water, a different set of rules applies. Lineup etiquette is the social code that keeps surfing safe and orderly. While you will likely be in the whitewater and away from the main lineup during your first lesson, understanding the basics is crucial for when you progress. The core principles are about safety and ensuring everyone gets a turn.
- Don’t Drop In: This is the cardinal sin. The surfer closest to the breaking part of the wave has the right of way. Never take off on a wave if someone is already up and riding it.
- Stay Out of the Way: When paddling back out, do not paddle through the main surf zone where people are riding waves. Paddle wide around the impact zone.
- Apologize When You’re Wrong: If you accidentally get in someone’s way, a simple hand wave and an apology go a long way. Humility is always respected.
* Hold Onto Your Board: A flying surfboard is a dangerous weapon. Do everything you can to control your board, especially when a wave is coming.
As one guide notes, « getting your head around surf etiquette is almost as important as learning the technique itself. » Locals aren’t hostile to beginners; they are hostile to beginners who are unaware and unsafe. By being respectful, cautious, and humble, you will not only have a better experience but will be welcomed back.
How to Sequence Diving, Hiking, and Climbing to Avoid Injury and Equipment Chaos
Combining multiple adventure sports in one trip is an incredible way to experience Australia, but it requires careful physiological sequencing to avoid serious risks, particularly when scuba diving is involved. The most critical rule, which is non-negotiable, is to always complete your altitude-based activities *before* your diving activities. This means you hike and climb first, then dive.
The reason for this is a medical condition called decompression sickness (DCS), or « the bends. » When you dive, your body absorbs nitrogen under pressure. You must ascend slowly and perform safety stops to allow this nitrogen to be released gradually. If you ascend to altitude too quickly after a dive—either by hiking up a mountain or flying in a plane—the reduced ambient pressure can cause this residual nitrogen to form bubbles in your bloodstream and tissues, leading to DCS, which can be a life-threatening emergency.
The guidelines from medical experts are clear. The CDC dive-medicine guidelines recommend a minimum surface interval of ≥12 hours after a single no-decompression dive and at least 18-24 hours after multiple dives before ascending to any significant altitude. By planning your itinerary to climb first and dive later, you completely eliminate this risk.
Here is the correct order of operations for a multi-sport trip involving diving:
- Go mountain climbing and hiking first to minimize any potential risk of decompression sickness.
- Ensure you are well-rested and hydrated after a strenuous hike before you go diving. Fatigue can increase your risk of diving-related issues.
- Always leave a minimum 24-hour surface interval before flying after completing any type of diving.
- If your drive home involves crossing a mountain pass, you must also allow a sufficient surface interval, ideally 24 hours, or choose a route that avoids high altitudes.
Beyond safety, this sequence also makes logistical sense. It’s far easier to manage wet, sandy dive gear at the end of a trip than to lug it up a mountain. Plan smart, stay safe, and put your high-altitude adventures at the beginning of your itinerary.
Key takeaways
- Australia’s varied coastline acts as a natural « environmental ladder » for learners, from calm bays to challenging point breaks.
- Adopt a « skill stacking » approach: master balance on a SUP, build power with a kayak, then combine these skills to learn surfing.
- The right equipment is non-negotiable. Use the volume-to-weight ratio (100% for beginners) to choose a stable board that accelerates learning.
How to Combine Diving, Hiking, and Reef Experiences in One Australian Adventure Without Burnout
The ambition to see and do everything on an Australian adventure can quickly lead to exhaustion and burnout. The key to a successful, high-energy, multi-activity trip is not to do less, but to plan smarter. Adopting a « hub-and-spoke » model is a highly effective strategy for maximizing experiences while minimizing travel fatigue and logistical chaos.
This model involves setting up a single base camp in a strategically rich area for several days, rather than constantly packing and moving. From this « hub, » you can embark on a series of shorter, low-fatigue « spoke » excursions. The Whitsundays are a perfect example. By basing yourself in a location like Airlie Beach, you can plan separate day trips for paddling, visiting the reef, and hiking on the islands. This approach replaces long, tiring transit days with more time spent on activities.
This strategy allows for flexibility and better energy management. After a strenuous day of hiking, you have a comfortable base to return to, rest, and properly clean and dry your gear. You can then tackle a snorkeling or paddling trip the next day feeling refreshed. It also promotes a deeper connection with a single region, allowing you to discover hidden coves and secret beaches that are missed on a whistle-stop tour. A case study from the Whitsundays shows how using paddle power from a single base allows visitors to become « one with nature, » spotting turtles while gliding across brilliant-blue waters—an intimate experience born from slowing down.
Finally, this model reduces mental burnout by simplifying decisions. Instead of a new plan every day, you operate from a stable foundation. Even short rental experiences become more enjoyable and less stressful when the provider takes a few moments to offer guidance, as one first-time paddler noted: the instructor « took the time to show us the required paddles, techniques and explained the conditions… to set us up for success. » This small investment in quality guidance, combined with a smart itinerary, prevents the kind of frustration that leads to burnout. Choose a great hub, and let the spokes of your adventure unfold naturally.
Your Australian water sports adventure has the potential to be a transformative experience. By moving beyond the mindset of a casual tourist and adopting the structured approach of an athlete, you can achieve real, measurable progress. Stop being a perpetual beginner. Start planning your progression, choose your equipment with purpose, and use this playbook to turn your next trip into the ultimate skill-building camp.